Top Social

Image Slider

Let's get it started!

7/31/2013
That song was running through my head as I walked into my room yesterday wondering where to start!

This is my motto for this year!

When you go into your classroom for the first time(s) in the summer, do you just kind of stand there and wonder how this is all going to get done?  I do this every year and it wastes so much time!  This year, something clicked and I got so much done that first day.

I started by moving the furniture into place (not student desks, those are stacked on top of each other in the center of the room).

Then I cleared off all of my shelves (and cabinets) which was where everything was thrown during the move.  This let me organize and set up the shelves the way I need them for September.
Obviously, things I wanted stored on those shelves stayed.  Once everything else was off, I organized the stuff that stayed.

I gave tables different "assignments" so that I wasn't just dumping a giant mess everywhere...well it's still a giant mess but it's sorted by category. 

Here is the "To File Table" which is right next to the filing cabinets:

And the game/centers table:

No picture I have a small table by my desk that is holding all of the things I need for back to school like packets I need to copy, bulletin board borders, staplers.  My small group table is where my small group things are going.

I have a TON of teacher's manuals!  Because everything is individualized in my room, I have 3 different math sets/kits for 3 different grade levels (9 total)...and that's just math!  I decided to line all of these things up on top of my shelf....I don't plan on sorting through them this summer so they will stay there until I get to them during the school year.  It's important to realize that you can't do everything this summer...some things are going to have to wait!  You need to have a life too! This looks neat enough that it's not bothering me. 

Now that the shelves are free, I set up my reading group library:

and my student library: 

I LOVED starting my room by emptying all the shelves and cabinets because after one day, I had started setting up areas of the room, I can see what future projects will take the most time and space in the room (filing and games for me!).  It's saving me a lot of time...if I did one shelf at a time, I would be filing papers and putting game pieces away 900 times.  This way, I can come in and filing everything all at once.  I can pull out all of my games and organize them at once and I won't find an extra game 2 days later hidden in some corner.  

I hope this gives you a starting point if you were stuck like me!  What are your favorite getting started tips for setting up your room?

Monday Made It!

7/29/2013
I went to my classroom last week and started to panic because there is soooo much to do still!  I don't go back until September but I'm already freaking out haha.

I'm in the middle of a ton of projects for school and my house so this is a short post! 

I saw this somewhere on pinterest (I don't think I repinned it though)
Super bad quality picture (like bad even for me!  sorry!) but this is how I'm keeping track of my reading groups.  I made a spot for 6 groups.  Each circle has a spot for the reading level of that group...I can never remember reading levels!  I have tiny clips that I wrote their numbers on so I can easily move kids in and out of groups.  I could also write their numbers on the circles.  I'll add this as a fan freebie to facebook tonight or tomorrow...make sure you "like" my page so you don't miss out!

The other thing I made was a power point for curriculum night.  We don't have curriculum night until the end of September (after school has started) but I'm always so busy then so I made it now.  It's SOO cute! (you can grab it here or by clicking on any of the pictures...if you need anything added email me!)


As always, thank you to Tara for hosting Monday Made It!  Go check out her super cute birthday jar! 


My Father's Dragon

7/25/2013
Have you read My Father's Dragon?

It is seriously one of the cutest chapter books ever!  I decided to start my year with it this year because it isn't too heavy.  The kids will love the story and I can focus on teaching them how to respond to reading instead of focusing on the deeper meaning or difficult vocabulary.  The best part?  The book is free!  Yes free!  Keep reading to find out where to get it...

I made a reader's response journal to go with the book and then I kept adding more to the packet like a story summary sheet, writing paper with characters on it, a booklet so kids can continue the adventure, retelling pieces, a puppet, and more!

I am so excited to do this with my class! 
How cute is this puppet?!? And it's not even painted yet! 

Each chapter has a question/questions for students to respond to.  I really want to teach my students to restate the question, write in complete sentences, answer all parts of the question, and use details from the text.  With each chapter, I model how to do one of those skills.  By the end of the book the students really have the hang of answering questions.  The questions aren't overly complicated so the students can become familiar with answering questions completely.  There is a rubric for grading the responses too.
Each character also has a circle map that I include in my journal.  I've included circle tabs to make it easier to find different sections in the journal (response, characters, quick checks).  Speaking of quick checks, I've included a mini quiz for each chapter (3 questions).  All of the questions are "right there" questions.  I really just want to make sure they understood the basic events of the chapter.

I added some simple story maps for students to fill out as well as writing paper.

I made 3 different book marks for you to use with your class.  Pick the one you like (one is black and white so they can color it).  Add ribbon to the top if you'd like.  I made the book marks because they are all getting their own copy of the book!  

My Father's Dragon is old enough to be in the public domain so it is available for free online here.  I copy & pasted the text into word and then spaced it so new chapters start on new pages & added a cute cover.  I included the book in my packet too.  I love this because it means my kids can write in the books.

By the time we finish the book (10 days), I am usually ready to have centers up and running so I included some writing paper & books for students to work on during centers.  I'm still working on what reading centers will look like next year but I know I'm going to have a retelling center so I included pictures to put in that center:

I didn't laminate them yet but once I do, I'm going to glue them on Popsicle sticks or clothespins and just store them in a ziploc bag.


If this is something that interests you, click on any of the pictures to grab it!  It will be 25% off for 2 days only! 


*This post contains affiliate links

My Ikea Shopping Trip!

7/24/2013
Hi readers!  I haven't posted in a while because I was on vacation.  I think it was the longest I've gone without thinking about school in a long time!  I didn't forget about it completely though...I did go to my favorite store {Ikea}.  I always love looking at what other people buy so I thought I'd share my purchases :) 

Here is what I got:
FLYT Magazine file IKEA
I couldn't leave without some of these...I wanted to buy pretty plastic book boxes for my students but I am spending WAY too much money on my classroom so I'm going with these. $1.99 for 5 can't be beat! 

BYGEL Rail IKEA Can also be used as a towel rail or a pot lid rack. Saves space on the countertop
I grabbed 2 of these rails...I'm going to stick strong magnets to them & stick them on the chalkboard.  It was only $2.99.
BYGEL Container IKEA Can be hung on BYGEL rail or mounted to the wall. Saves space on the countertop
I also grabbed enough of these for the rails...all in pink because I didn't like the other colors available. These were .99 each.  I'm honestly not sure what I'm going to store in these yet.

TOLSBY Frame for 2 pictures IKEA You can display one picture on each side as the frame has no back panel.
I'm using these as my center signs...at least that's the plan! Also .99!

LAMPAN Table lamp IKEA
I grabbed this $5 light because I love using lamps in the classroom and this one is all plastic so it won't be too bad when it breaks. 

SKURAR Plant pot IKEA
I'm using this as a pencil holder on my desk...it was too pretty to pass up! 

LEKPLATS Play mat IKEA The latex backing keeps the rug in place when the child runs/plays on it.
I have a lot of boys next year (3 girls, 9 boys) so I thought this would be a fun rug for free time....it's BIG and only $15. 
BYGEL S-hook IKEA
I grabbed these S hooks to hang chart paper in the room. 
SMULA Tray IKEA
This tray is clear (it looks white in the picture).  I actually got this to put my cat's food dishes in so they don't slide around.  I'm sure there are tons of classroom uses for it also! $2

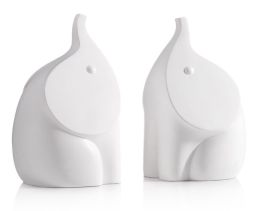
While waiting for a table at Cheesecake Factory, I ran next door to Barnes & Noble and I found the CUTEST book ends EVER!
Jonathan Adler Elephant Bookends
These are even cuter in person...I love the little elephants!  These are for my future nursery and not my classroom.

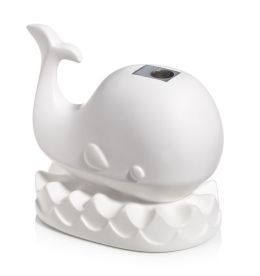
And since I'm doing an under the sea themed classroom this year, I had to grab this cute pencil sharpener for my desk at school: 
Jonathan Adler Whale Sharpener

I'm just realizing that most of what I bought is white!  I figure that it goes with everything and no walls in my house are white so all of these white accessories pop.  

Since I've been back, I've been busy getting some materials ready for September so stay tuned :)


Lollipop Trees and Labels

7/15/2013
Last year, I pinned a cute lollipop tree that I HAD to make but I had a student who couldn't have any outside food so I waiting until this year to make it.  {It's not just that he couldn't have any outside food but he has Prader Willi which gives him food seeking behaviors so he had to be watched at all times to make sure he didn't eat anything.  We couldn't have any food out in the room at all.} I'm so excited that I got to make one this year!  Here's my tree with a twist: 

I used Blow Pops instead of dum dums.  Most of my students chew gum for sensory reasons so I figured why not use a lollipop with gum in it.  The only problem is that these have the twisty thing on the top so it doesn't look as polished at the dum dum ones.  These also aren't round, they are oval so there are small gaps between some of them.  
This is one of the prizes for clipping up during the day.  The other prizes are a prize box item or a coupon from the best beehavior binder.  I colored the bottom of some of the sticks with a sharpie...the kids who pick those will get to choose a second prize!  
It took 2 seconds and it adds such an element of surprise to the lollipop tree :) 
Since you never know what allergies might end up in your room, I cut out the ingredients/nutritional info and I'm storing it in the flower pot: 

This was SUPER simple to make.  I just grabbed a pot I liked, spray painted it (I primed my first because it was a glazed pot and I wanted the paint to stick), stuck one of those flower foam balls in the pot and inserted the lollipops (starting at the top). 

Onto my second project this week....supply bin labels which you can grab for free :) 
Sorry for the terrible picture, the lighting in the room was terrible and I only had my phone. 
These labels are SO.CUTE. After I got to school, I was a little annoyed that they were slightly too big for the containers so I made them all smaller for the freebie.  These containers are the 5 for $5 ones at Target.  Labeling everything helps my paras know where everything is wihtout having to ask me.  My goal is to label everything in my room haha. Click the picture below to grab your free labels!  

{Click on the Fab Freebies Tab}


As always, I'm linking up with Tara from 4th grade Frolics for Monday Made It! I'm going to go check out what everyone else is making. 

Ten Pin Linky - Science & Social Studies

7/10/2013
I absolutely love Ashley's Top Ten Pin Linky!  It gives me a chance to go through my pin boards so I don't forget all the wonderful ideas I've pinned.  If you haven't been linking up, you should!  

\
Click the pictures to go to the sites!

My first pin I'm excited about...I just bought this yesterday:
Amazon.com: The Magic School Bus: The Complete Series: Lily Tomlin, Daniel DeSanto, Erica Luttrell, Maia Filar, Tara Meyer, Larry Jacobs, Charles E. Bastien: Movies & TV
I saw on facebook yesterday that it was only $29.  Earlier this summer, I had looked at it but it was much closer to $50 so when I saw it yesterday, I bought it.  When I went back to get the link for the picture, it is back up to $45.  {If you follow me on facebook, you had a heads up about the price jumping.  If you don't, would you?  Please? Thanks!)  
Back to the dvds, last year, I watched a few of these with my students.  They learned SO MUCH from these videos.  I recently went to a conference on Autism and the biggest tip was using video modeling to teach students with autism. {Confession: This made me feel so much better about all of the movies we watched last year!}  These videos are super entertaining for all my kids but they are especially helpful for my students with autism.  

I have a bunch of pins like this one...Ginger from Ginger snaps organized picture books by topic:
Ginger Snaps: Favorite Science Books! Science Week!
Go check them out!  

I think this would be really cool to get this and put it on our window.  Great for life cycles!
This would be cool on the kitchen window....or the classroom window!

And how fun would this be to do?  I'll do this during our animal adaptations unit.
Cover hand in shortening to demonstrate how fat keeps animals warm in winter. kids LOVE this experiment.

In my school, we use QPEOC (Question, Predict, Experiemnt, Observation, Conclusion) for the scientific method.  I made these posters & a science journal to use last year.  I love having them keep their science things together.  I'll be updating this soon for next year.
Simple science journal with posters taking kids through the scientific process

How fun would this be to make as a class?  If you have a TON of broken crayons you might be able to do one per kid (small jars).  It's a candle!  You put the wick in, fill with crayons & leave outside for the sun to melt the wax!
Sun melted crayon CANDLE - Fun Summer project for kids
Communities is the biggest part of my social studies curriculum for all 3 grade levels.  I like the idea of making towns with paper bags instead of sticky milk cartons, easier to decorate too.
Make suburban, urban, and rural towns!!

With 3 full curriculums to get through, I need to incorporate science and social studies into ELA. That's why I love these Magic Tree House books & the book companions that go with them: 
Revolutionary War on Wednesday...a book companion to go along with the Magic Tree House book... included comp questions, graphic organizer, classroom posters!

This is my FAVORITE book for teaching map skills:
Cute children's book about maps-"There's a Map on My Lap!: All about Maps"

Every year, the third graders make salt dough maps of China.  I like that they color coded this one:
3D Salt Sough maps

I have some new ideas that I'm off to start working on :)