Top Social

Image Slider

Showing posts with label organization. Show all posts

Clutter Free Classroom Catch Up & freebie!

2/29/2012
I haven't been keeping up with the Clutter Free Classroom project but I have been busy organizing! 

Week 8's challenge was organizing and storing thematic units.  A few days ago, I posted about the new containers I bought.  Here one is with it's label: 
I don't do thematic units but I'm using these bins to store all the wonderful resources I get from all of you as well as seasonal books: 


Week 4 was all about the teacher's desk....Here is my desk before: 
Everything was just thrown in.  I don't really use my desk drawers so I should probably get rid of it BUT all the furniture in my school is accounted for right now so I have nothing to replace it with. 
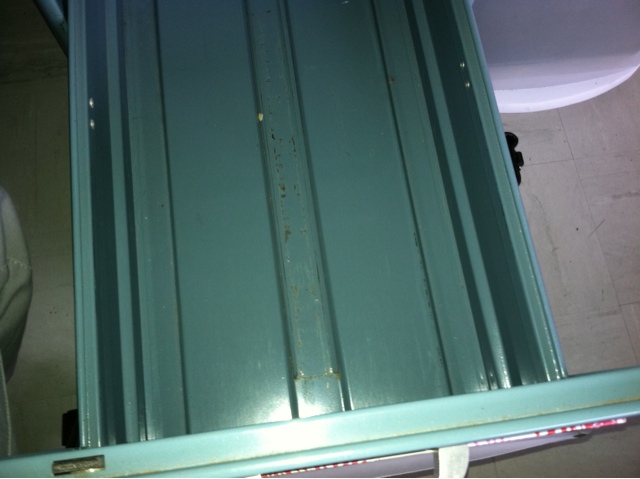
I took everything out of my desk drawers and threw stuff away:
 I organized what was left in small bins: 
The green basket contains my extra supplies like markers, pencils, post it's, Velcro, highlighters and I threw some stickers on top for quick access.  Next to that, I have a box of "teacher tissues".  In the back of the drawer, I have a blue bin full of rewards for my students.  I got rid of my prize bin but I do need to keep some incentives on hand.  There are bookmarks, play-dough, and glow sticks in that basket.  I put a bag full of teacher stamps on top (sign and return etc...).  Next to the blue basket, I put extra folders, card stock, Ziploc bags and page protectors.
My top drawer (not pictured) has my binder rings, clips, label maker, index cards and band aids...the things I use everyday.  

I also worked on straightening some shelves in my room: 
Before
After
I'll leave you with a freebie.  Remember my daily materials labels?
                                                      
Click the picture to grab yours!  I just have one little request - I'm almost to 100 followers so if you download the freebie, follow my blog (if you don't already) Thanks!!

Center Organization

2/11/2012
If you are like me, you have collected hundreds of freebies and activities from blogs.  I have quite a collection of holiday-themed games laying around now and I wasn't really sure how to store them.  I keep all my centers in  9x12 envelopes as many of you do.  I'm not sure if this is my favorite way to keep all the pieces together but it's not not working so I'm sticking with it.  
While I was at Target today I found the cutest containers.  
They are chevron stripe containers that are big enough to fit a TON of my activity envelopes. 
 I've been obsessed with chevron stripes lately so I bought one to try it out.  I always regret buying just one container...I'm already planning my trip back to get more.  
I plan on having a container for Sept/Oct, Nov/Dec, Jan/Feb/March, April/May/June so 4 total.  There is room for a ton of envelope activities & seasonal books, and manipulatives on the side.  All of my seasonal materials will be off my shelves and out of the filing cabinet which will open up some room.  I can also store these in my basement easily and just switch them out every few months if I get moved back into a closet room.   These would be great for science units or themed units as well.  

On a completely different note, I know many teachers have laminators at home.  I have the scotch thermal one and I love it but the pouches are expensive.  
Royal Sovereign Laminating Pouches - 200 ct.
These are at Sam's club - 200 pouches for $20!  I actually bought a different brand but they were the same price for 200.  If you have a membership, it's worth checking them out! 

I just realized that this post fits with Week 5 of the Clutter Free Classroom project!  Click on the image below to join in!

Daily Materials

1/10/2012
This year started off so well!  I was always planned ahead...I was on top of paperwork...I made like 20 games from all of your TPT stores...It felt great!  This all fell apart in the second quarter and I'm not really sure why.  Now that I have fallen behind, my paper piles are coming back and I can't find things.  I need to set up permanent systems for taking care of all the paper.  

I stopped at staples last week for $3 file folders and $15 rolling carts.  I like to keep file folders on hand so if I find materials that I want to keep, I can quickly make a file for them.  I planned on using the rolling carts for my daily lesson materials.  My school uses a 6 day cycle and these have 6 drawers - 1 for each day!  So this weekend I started making labels and I LOVE how they came out.  

Here they are in my classroom with my new sub plans holder:  

I'm hoping that this will absorb a lot of my paper mess...like when I go to the copier and come back with a 100 copies that end up sitting on my desk for the next month.  The next project on my to-do list is permanent sub plans (I already made the cute sign).  I'm going to grad school full time starting February 1st and I really need to get my act together before then!  

Magnetic letters

12/16/2011
I'm a sucker for a good deal...who isn't?  A year ago, I found alphabet sets at a ridiculously cheap price (I don't remember what it was now but trust me, it was good).  I got carried away and long story short, I ended up with 20 alphabet sets in a big zip-lock bag.  No kid is going to dig through 520 letters to make words so this was obviously a terrible storage solution.  I finally decided to sort all the letters and figure out a new storage solution. 


That was not an easy task so these sat on my windowsill until I thought of something.  I went to Michaels to see what kind of container I could use and here is what I came up with: 


Photo boxes!  Sorry for the sideways pictures...

I put one complete alphabet in each box.  Every student can grab their own box and work independently. There is probably room to keep 2 sets of letters in each box but I think that may be too many letters to sort through for many kids.  I plan on making a set of task cards for each box as well.  I'm keeping a few alphabet sets for those times when kids need 2 of one letter.  I can't wait to reveal these to my kids next week!

If you have a different way you store your magnetic letters, please share in your comments!

At-A-Glance Sheets

9/17/2011
I may have mentioned this before but every year after reading the IEPs I create at-a-glance sheets.  I basically summarize the IEP onto one page so I can quickly view important info at a glance.  Each year I seem to add more info to this sheet.  This year, I added the students birthday and the parents contact info.  Obviously because of confidentiality I can't show you my students sheets but I made a sample one for you to see.  It's nothing fancy but visuals are always nice!  

Click on the picture to see the full document.  I rarely look at the students actual IEP after creating these sheets  (I do read each child's IEP at the beginning of the year).  I also give these sheets to the classroom teachers after they have read the IEP.  The classroom teacher, the aide and myself sit down and go through the IEP together some time in September just to make sure everyone is on the same page.   

I hope this is something that can help you keep your student information organized too! 

-Becky

Pintrest

6/27/2011
Pintrest.com is my new favorite website.  I'm a person who loves mood boards and pintrest.com is basically a mood board site.  Once you sign up, you will add a "Pin it" button to your favorites and create board titles.  Then as you go through websites and see ideas you like, you click the Pin It button and select the picture you want.  It pins it to your boards for you, attaching the link to the site you are on.  I made boards for teaching ideas, house ideas, wedding, and art.  I'm thinking about breaking my teaching ideas board into Lesson Ideas, Center Ideas, Decorations, and Management.  Then when I need a lesson idea, I can quickly go to my board.  Love Love Love this site!

Project Organization Phase 13: Notebooks

5/22/2011
If you are like me, you buy a bunch of .10 notebooks before each school year.  I have about 5 spiral notebooks at each building and just grab one on my way to meetings.  The problem is I don't have 1 notebook for RtI, 1 for CSE, 1 for staff meetings and so on so all of the information is mixed together.  To find notes, I would have to look through 10 notebooks. 

Remember, organization is about being efficient with your time and this is definitely not an efficient system.  This is a simple fix that you can choose to do mid-year or start when the new school year begins.  Gather your notebooks - new or used.  Rip out the used pages if you are starting with used notebooks.  Put the empty notebooks on your shelf.  The next meeting you go to - grab a notebook and label it.  Continue to do this every time you need a notebook - as long as it is an event/meeting that will reoccur. 

Here are some times when I use notebooks:

RtI Meetings
CSE Meetings/planning
Principal Discussions (observations, concerns, anything where you meet 1 on 1 with the principal)
Professional Development Workshops
Staff Meetings
Parent-Teacher conferences
Congruence with Teachers

Project Organization Phase 12: Centers

5/07/2011
I know many special education teachers who do not have centers.  What I mean by centers is small group games that have clear instructions attached to them.  The games focus on specific skills.  I am building my collection of centers by creating the fcrr.org games and file folder games.  The problem is organizing them.  There are HUNDREDS of games on fcrr.org, if not thousands!  Organizing these seems overwhelming.  Here is what I'm doing:

1. Center games are labeled with the skill they work on as well as a grade level.  FCRR.org games are chunked into K-1, 2-3, 4-5.  Within each group they have Phonemic awareness, phonics, fluency, vocabulary, and comprehension.  Most of these games I keep in large envelopes.  I re-type the instructions (some of them say "the lower student" on the website so I make them student friendly) and glue them onto the front of the envelope.  On the back, I glue a picture of the game being used (these are on the website so I just cut them out).  I also glue on extension activities.  The envelopes I bought have a sticky close top.  I type up the game title, reading area, and grade level and print it onto colored paper (I type a bunch up at a time and cut them into strips to cover the sticky strip on the envelope).  That colorful strip gets stuck to the envelope and it all gets laminated.  I cut open the pocket and keep the game cards/board inside the envelope.  File folder games are simply labeled with the skill area or game title on the tab: "Multiplication Madness". 

2.  After you have a collection of centers, find baskets that are large enough to hold a bunch of them.  If the baskets are too big they will just take up space.  Finding the perfect baskets may take a while but it will be worth it in the end.  When you find them, buy a lot of them. 

3.  Label your baskets with your group names.  Go through the centers and sort them according to who could work on those skills.  My group who is working on fluency will have a lot of fluency centers but they will also have some phonemic awareness, phonics and comprehension centers as well.  These can change as often as you would like so don't overload the baskets with centers.  I plan on changing mine quarterly.  You can also add "When I'm Done" activities to these baskets. 

4.  Centers that do not fit with any group will be stored in storage containers.

This project will most likely be a ongoing one.  It takes a long time to create these games and find the right baskets. 

Project Organization Phase 11: Class Library

There are a thousand websites out there that will help you organize your classroom library.  Most resource room teachers are in a tiny room and have a fairly small library to choose from.  I have a few group sets of books which I keep together on one bookshelf.  These are books that I use with whole groups and they are usually off limits for students to read on their own (in case I use it with their group later on).  I also have a collection of picture books which I use to introduce topics and teach strategies.  These books are also off limits to my students and they are kept on a shelf behind my desk. 

I have another collection of picture books, chapter books, magazines, and reading a to z books that my students can read whenever they have time.  My group sets and these books are organized by Fountas and Pinnell levels.  My students know their reading level and if they forget, they ask.  They want to read in their level.  I showed my students how to look up their books on scholastic's book wizard.  Back to the library organization...the printable reading a to z books are kept in baskets labeled with the level.  Series books are also kept in baskets (magic tree house, junie b jones, time warp trio etc...).  Any book that isn't in a labeled basket has the reading level written inside the front cover.  They are grouped together.  I cut long strips of construction paper and wrote a reading level at the end of it to mark where each level is.  

I know many teachers have their books organized by topic and genre but since I work with k-5 and I want my students reading at or around their level I chose to organize by reading level.  If you like the idea of using baskets, look at your local dollar store. 

If you are going to tackle this project you need to have a few hours to work.  You will need a computer, a sharpie, and baskets if you choose to use them.  You will also need some way to mark the shelves/baskets with reading levels.

1. Put all your books into piles around your book shelves. 
2. Make your labels - I chose to buy alphabet stickers and made a label for all 26 levels. Make it as creative and complicated or as simple as you want.
3.  Start looking up each book on scholastic.com/bookwizard.  When you find the level, mark it on the book and set it on the shelf with it's level label.
4.  Continue to do that until all your books are leveled.  Of course, some books will not be found on scholastic's website.  That's fine, leave those in a pile until you are done. 
5.  Now that most of your books are labeled and leveled, align them neatly on the shelves.  Make sure the shelves are clearly marked for your students. 
6.  Use Fountas and Pinnells books or google to find the levels for your remaining books.  Add them to your shelves as you find them. 
7.  As you buy new books, make it a rule that you level it before it goes on the shelf. 

Project Organization Phase 10: Teacher Books

This is a pretty simple area but it's something that we haven't talked about yet.  My goal is to cover every area of your room.  First, gather all your teacher books.  Next, clear a spot for them.  They should be kept together so if you need to use one as a reference or to make copies you only have to look in 1 spot.  Once you have a space ready for your books, play with how you want them displayed.  Here are some things to try:

1. Line them up according to height. 

2. Line them up according to color - all red books together, then orange.  Within each color, organize them by shade (dark to light) not height!
3. Organize them according to subject.  Writing books group together then reading and so on.

This is a fairly easy task and it's free.  I organize my books by subject/height in my classroom.  At home, I like to group books (and video games) by color because I love the way it looks.  I know what color most of my books are so it's not hard to find them.

Follow Up Board

5/06/2011
I was reading other blogs for some crafty classroom decorations and I came across a menu board.  It was pretty and decorated with different scrapbooking paper and embellishments.  I loved the concept and I'm thinking about making one.  It gave me the idea to make a Follow Up board for each building, kind of like the menu board.  Anything I need to follow up on gets written on a post-it and stuck to the board.  Quickly check the board every day to see what things need to be done.  

A few days ago, while walking down the hall, a para stopped me and told me a student needed a new notebook (it's one I make for him).  I had completely forgotten about it because it wasn't written down anywhere.  In the future when I'm stopped in the hall, I can say "Sure, just add it to my follow up board so I don't forget."   

We have RtI meetings every 2 weeks in my district.  For special ed teachers, these meetings become a giant to do list.  When I'm at those meetings, anything I need to follow up on goes on a post-it and stuck to the board.   Sometimes students ask me to do something for them, like help them choose a book they would like.  I can ask them to add it to my follow up board as well.  I feel that this could be an organization strategy that may show students how to organize themselves as well. 

Project Organization Phase 9: Manipulatives and Art Supplies

5/01/2011
Math manipulatives can be full of tiny pieces.  I bought a small 3 drawer rolling cart from Target to house my math supplies.  One drawer is for games and flashcards.  One drawer is for counters.  One drawer is for other manipulatives like clocks, snap cubes, fraction tiles, and place value blocks.  I bought dried beans and pasta to use as counters.  I dumped those into ziplock bags.  Other counters I have stored in little plastic food containers.  Nothing is just dumped into the drawers loose.  If I need 5 clocks for my lesson, I want to be able to pull open the drawer and get all the clocks in less than 10 seconds.  I don't want to dig around in the drawer finding each clock.  Students can also easily find what they need this way as well.  If you number the amount of clocks you have on the outside of the bag, you can quickly see if any are missing. 


Art supplies I have talked about in the past.  I stock up on crayons, colored pencils, glue and scissors during back to school sales.  I simply throw it all in my plastic art shoe box I bought from Lowes.  Construction paper is put next to or under the box.  Here is a picture of my art box (this is one I keep at home for painting supplies):